If you are not already familiar with Department of Defense standards for cyber security there is no better time to start reading about it. There is a great writeup here on SecureTrux on definition of an ACAS.
ACAS is primarily a Commercial Off-the-Shelf (COTS) suite of software vulnerability scanning tools for networks and applications. Following challenges in the federal and DoD supply chain due to poor visibility into security and data systems, the Defense Information Systems Agency (DISA) awarded Tenable a contract to develop products that could assess enterprise networks and systems within the guidelines of DoD compliance standards.
or the simplified and straight forward definition:
ACAS is the set of network tools determined by DISA in 2012 to serve a necessary security function for use with the DoD Information Network (including NIPRNet and SIPRNet components and connections).
In order to add some experience to my skillset, I really want to see how hard it is to roll out a mockup of a DoD approved and configured network. After I get through the initial RHEL and Nessus configurations I will in another post spin up a Windows Server and a few Windows clients to practice configuring Group Policies, STIG compliance and other requirements outlined on the DoD Cyber Exchange – see Policies & Guidance if want to get some in depth reading. By the way, make sure you complete your Cyber Awareness 2025! 😀
If you are not familiar with Red Hat Enterprise Linux or the Center for Internet Security’s Hardened Images then you need to get to work reading! These are community-developed secure configurations of many Operating System distributions. I will be focusing on Red Hat Enterprise Linux since it is commonly deployed for DoD usage – see here at the Red Hat DoD page or if you want you can read the ebook Mission edge: How Red Hat helps accelerate DoD mission outcomes.
## RHEL 9.5 Installation ##
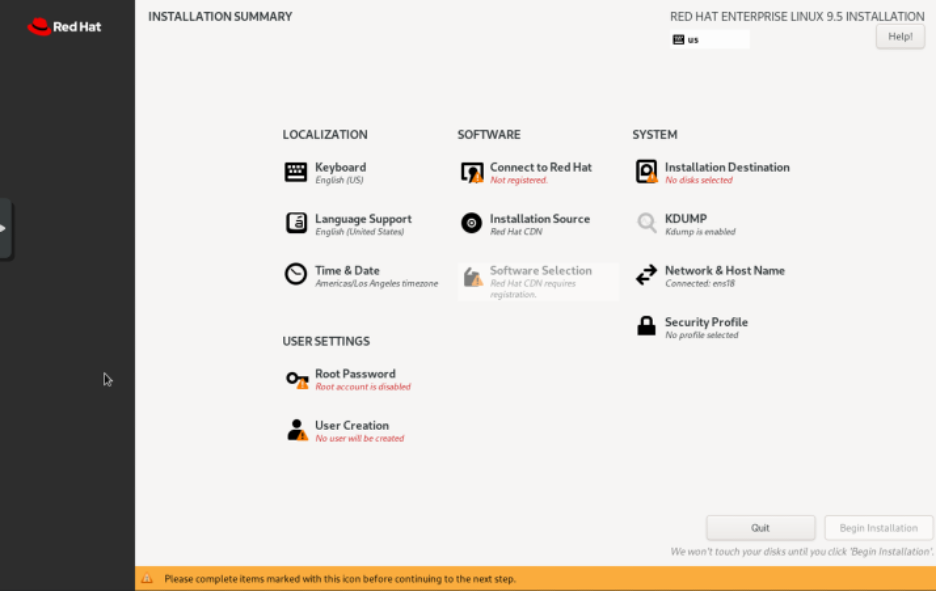
The initial view of the RHEL 9 installation has a few areas to complete as seen below:
For my Security Profile selection I chose the CIS Red Hat Enterprise Linux for Level 2 – Server. Since I am learning, I took a dice roll on using the more hardened edition vice CIS Level 1.
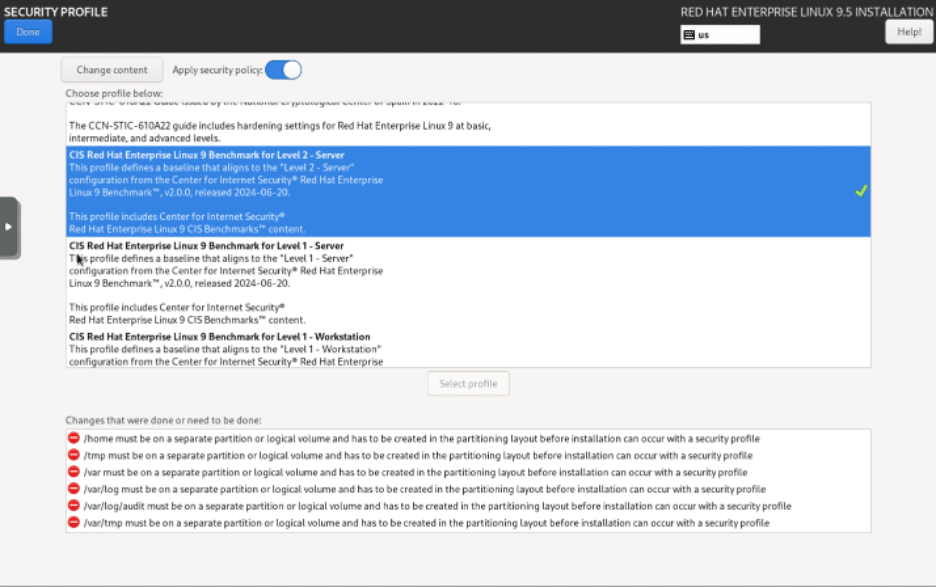
Reading over the CIS Level 2 selection warnings you will see it is required to make separate partitions for the following directories:
/home
/tmp
/var
/var/log
/var/log/audit
/var/tmp
You will add these under Installation Destination in the menus. I found a nice guide to confirm a roundabout amount of space to allocate to each at Any Tech Stuff – but I can resize later if needed. I also took his advice on basic install items minus the SMTP server since I don’t need any mail services.
1. System Tools
2. Legacy Unix Compatibility
3. Network File System Client
# I DISCOVERED LATER, I NEEDED MORE SPACE FOR NESSUS
# 30GB MINIMUM STORAGE – SPECIFICALLY THE /OPT VOLUME
# RESEARCH ACCORDINGLY HERE – Nessus Hardware Requirements
There are a few guides out there if you want to see the full process. Google is your friend!
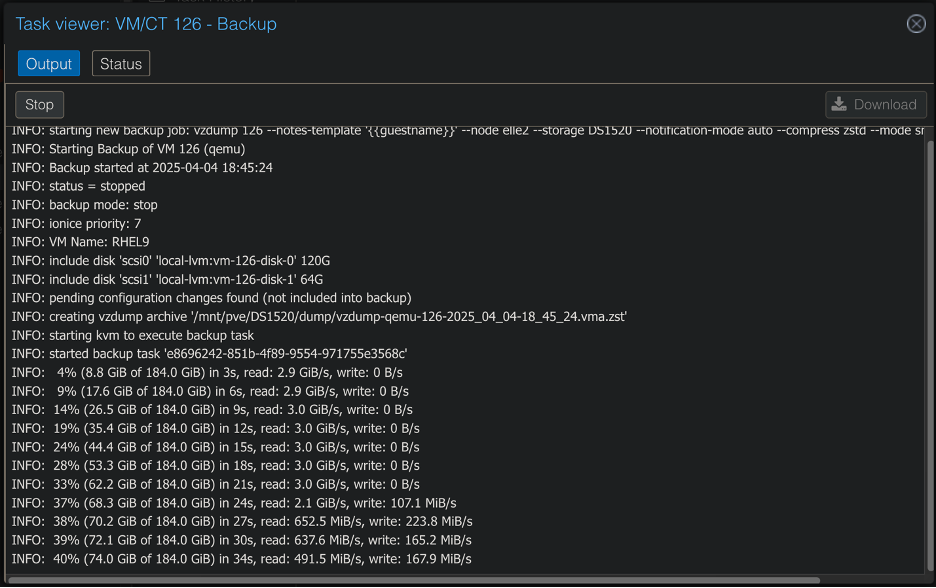
Backup your RHEL server in Proxmox. You never know – you might mess up everything having fun here.
After the installation and setup you will arrive at your basic headless Linux server.

There was a notification for enabling the web GUI not included in the screenshot. Enter the following command:
systemctl enable --now cockpit.socketand then this command to ensure it is up and running:
ss -tulpn | grep :9090You should see the following:

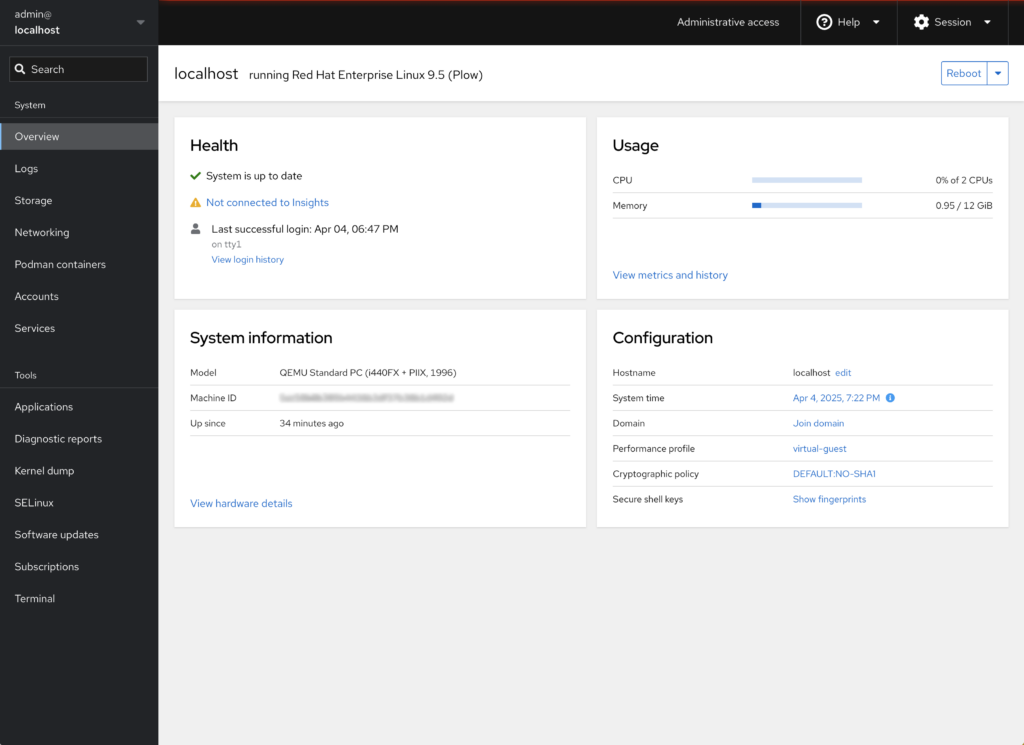
So now that your RHEL web interface is live, use your VMs IP address to go to the site.
https://IPADDRESS:9090I can’t say from experience yet whether it is ideal to install this in a DoD environment, but for learning purposes, I installed it.
For our next step I am going to go ahead and full send with the Nessus install and see what I can make happen. Download can be found here at the Tenable site.

Jump back to your terminal in RHELs web interface and grab the file:
curl --request GET \ --url 'https://www.tenable.com/downloads/api/v2/pages/nessus/files/Nessus-10.8.3-el9.x86_64.rpm' \ --output 'Nessus-10.8.3-el9.x86_64.rpm'Then use YUM to install the RPM:
yum install Nessus-<version number>-es6.x86_64.rpmAfter the download you can install as root and view the completion as seen below:

Then can verify if it’s running with the ss command:
ss -tulpn | grep :8834NOTE: since you don’t always know the port number of a service, you could run a reduced version of the command and see all the open ports:
ss -tulpn
Additionally you can see if the Nessus service is running with:
systemctl status nessusdOnce you have verified the service is up and running you will need to unblock the port in your RHEL 9.5 firewall settings.

Then go to your Nessus web interface:
https://IPADDRESS:8834This can be a bit tricky if you get lost in the process. You need to register online, so click continue. Then register for Nessus Essentials and fill out your information to get an activation code.


So a few steps required to get it up and running but here we are at the tenable Nessus Essentials web interface:

You may notice you can not create a scan right away. Appears you have to let the update processes run first. But moving on through the settings I discovered in fact my initial setup of CIS Level 2 RHEL 9.5 VM storage space was not sufficient for running Nessus.


So you can see how this can be a bit of a learning experience if you don’t know what you need from the start. Which is exactly why experiments should always be done in the homelab or away from production environments.
Going to the Storage tab of our Red Hat web interface we can see that it is in fact the /opt file specifically being hit by Nessus. This is where many of the scans and logs are stored.

I am going to make another backup in Proxmox and then begin the exciting process of either breaking the VM or extending the storage space allocated to sda2.
FDISK (SKIP if you properly allocated over 30GB to your /opt volume.
And we begin our fdisk adventures! Probably the most dreaded experience in Linux if you don’t do it a lot. This is a big part of why the GUI and Windows shell experience has been so dominate. Before calling it a night I went through all these steps and could not get Nessus to reset the scanner health errors. I even deleted the logs. So now we will start fresh on the backup I made previously – prior to the Nessus install.
Here is your command list – I’m not a pro WordPressor yet – so there is no magic click to copy button. You could probably clean this up with a script – but it’s important to understand the basics steps.
First you need to allocate more disk space to your RHEL VM in Proxmox (or whatever software you are using to virtualize) then use parted to verify the extra space:
sudo parted /dev/sdb print freeYou should see some free space available. Use fdisk to list the sectors used for the partition and take note of the start sector of your Linux LVM (write it down).
sudo fdisk -l /dev/sdbNow to begin the choas! This is a long command but you can see it step by step below – this is where the start sector comes into play, mine is 2099200. The 8e comes from the Linux LVM Id found above after running fdisk -l /dev/sdb.
sudo fdisk /dev/sdb <<EOF
Most of these commands are quite clear and using –help will aid in understanding them. The <<EOF section breaks down as follows:
d (delete) -> 2 (partition 2) -> n (new) -> p (primary) -> 2 (partition 2) -> 2099200 (start sector) -> [Enter] for default end -> t (type) -> 2 (partition 2) -> 8e (Linux LVM) -> w (write)Now we need to inform the kernel about the partition table changes without rebooting. We’ll use partprobe for this:
sudo partprobe /dev/sdbNow that we’ve extended the partition, we need to resize the physical volume to use the new space. Check the physical volume:
sudo pvdisplay /dev/sdb2Now we’ll resize the physical volume to use all the available space on the extended partition using pvresize:
sudo pvresize /dev/sdb2Verify the physical volume and check how much free space is now available in the volume group:
sudo vgs rhelNow to focus fire on the problem presented by Nessus – the /opt folder where all the logs are stored for our scans need a lot more space than I initially realized. Should have read over the hardware requirements. I’m using the lvs command to check the /opt volume size:
sudo lvs rhel/optAnd then to extend the /opt volume to meet the Nessus requirement of 30GB:
sudo lvextend -L 30G /dev/rhel/optI already know I am using xfs formatted filesystem but if you need to check:
df -T /optThen grow the /opt volume to use the whole additional space assigned:
sudo xfs_growfs /optThen the finale! Check and see if the sdb2 storage was extended and the /opt volume was resized to our goal of 30GB:
df -h /optNow I’ll return to the RHEL web interface to see if my fdisk journey is completed.

FDISK COMPLETE
After all our hard work navigating fdisk you can see the /opt volume has been resized to 32GB. Nessus should hopefully be happy now with the extra space. So now to re-install again.

Well, would you look at that – 32GB was just a little under the requirement. Likely because a few GBs are already being consumed in the /opt volume by the operating system. If you dig through the Nessus documentation you will see it operates heavily out of /opt. So ideally, you should just allocate whatever amount you feel appropriate to your scanning needs.
Nessus Essentials limits their free license to 16 IPs and we are not operating at a large scale or in a production environment, so you could delete logs as needed if you are restricted on space. Here we are at the web interface for Nessus. Host discovery does not count against your 16 IP limitation – so send a sweep out and grab some of your IPs for selection.

It works wonderfully! If you have ever spent a lot of time at a BASH based approach or via Microsoft Powershell you can really appreciate the simplicity. Let’s go ahead and setup a scan of an IP address. Choose whatever you wish in your own network.
Advanced Dynamic Scan
The menu is quite simple but still a lot of complexity if you are not aware of all the functions here. I am going to use the Advance Dynamic Scan.

Now I am not going to go super in depth here but I’ll will provide some basic concepts of the scanning capabilities. I initially configured the various categories below to my liking and launched a scan of another IP address in my network. But decided it would be much more fun to scan something far less hardened. So I spun up a Metasploitable 2 virtual machine and targeted it with Nessus.
Description and Targets setup is self explanatory. However the rest of the options to the left can get quite complex. For my second scan I used information provided by InfoSec Write-ups to gather more intel on superior settings to my initial scans. Check that site for more on the Discover, Assessment, Report, and Advance settings or looking through Tenable documentation as desired.

Now it’s time to run the scan! As you can see the Metasploitable 2 VM has quite the many vulnerabilities – 6 critical, 10 high, and 28 info items. I need to get back to exploiting this VM soon!

The Vulnerabilities tab reveals tons of information for offense and for defense as your projects may require.

And then the Remediations tab which is very helpful in identifying solutions to vulnerabilities found during the scan. Such as, “GNU Bash Environment Variable Handling Code Injection (Shellshock): Apply the referenced patch to address CVE-2014-6271 (Shellshock).” You can jump write over to the CVE website and research the Shellshock vulnerability with ease.

This is probably a solid point to stop and take a break. Of course I will continue to tinker and read through documentation for Nessus and see how it can be employed for helping me in offense. I’ve been utilizing Nuclei and Metasploit as of lately – but I felt an energy shift as I have been needing to train more on things applicable to my work. The DoD has standardized Nessus as it’s ACAS of choice back in 2012. If it’s not something you are training on then you may need to take a deep dive immediately!
Leave a Reply